
When in the wild, you are on your own! 15 important lessons MoneyFoodTravel learnt at their first wilderness survival skills camp
I have been on several treks before, but they were all with trekking groups, where everything was arranged beforehand. I was more of a tourist, enjoying nature while being still on the trek. This time it was to be no different, but then my trek got cancelled, and when my friends backed out, I asked a former colleague of mine to join him on his bushcraft/wilderness survival camp.
I have always been fond of the outdoors and this was something I always wanted to learn. Technically, what you see on TV—the outdoor and survival shows, are only a more elaborate and extensive version of the Boy Scouts training, which is part of the growing up culture in the West.
So, finally on 11 November, I was at the small village of Neuli in Sainj valley in Himachal from where we started the trek towards Shangarh village (6,500 feet above sea level).
My lessons had begun.
At one point on the trail we came across a sharp incline and I suggested taking a longer and less steep route. About 200 metres further, he stopped. We had lost our way. I learnt my first lesson there itself.
Lesson 1: When you have lost your way, stop immediately, try to retrace your steps, and if possible, reach a higher ground to get a better view of the surrounding.
We finally found a trail, but was it the right one? Would it lead to the right trail? We found the answer soon enough. He pointed out signs of human presence.
Lesson 2: The trail was littered with mule, sheep and goat droppings (domesticated farm animals). There were also the telltale signs of wood shavings and branches with clean cuts made by machetes or axes. The trail indeed led to a village. So, at least, we were not lost completely.
But the village was fenced and reaching the trail from there was a problem. He made me understand our position by explaining the route and terrain on a virtual map and finally we crisscrossed the bends to cut through the hills and were back on the trail again. I could not escape the steep incline, however much I wanted. There was another lesson I learnt.
Lesson 3: Never try an unknown trail during the night. It was daytime and within minutes he could realise we were on a wrong trail. At night, it could have taken us hours to get back on the right track.
I complained of a pain in the leg and he soon pointed out the reason. I had just about put on my hiking boots and my rucksack was slung over my shoulders. That made my progress a bit slow, too.
Lesson 4: I soon realised the importance of a having a snug fit on my feet and my back. That made my hike much comfortable.
By mid-noon, we reached this very pretty little village overlooking an idyllic green meadow. After the smog in Delhi, the fresh air and the local food of rajma, rice and pure ghee was indeed very soothing. The owner of the house where we put up was a gem of a person and he made sure we had a pleasant stay. 
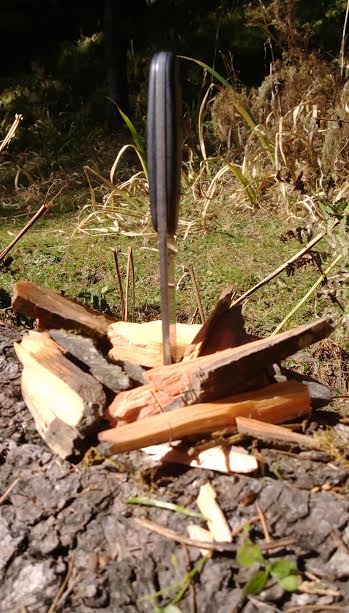
The next morning we went on a day hike, where I learned a lot about a few basics of bushcrafting, namely making a fire stick, wood processing and the like.
Lesson 5: Not all wood catch fire easily. So, one can make a feather stick by delicately shaving the bark into thin strips in such a way that the shavings remain attached to the stick. Feather sticks catch fire quicker than a log. 
Lesson 6: In the winter and the rainy season, scraping off the moist outer bark of timber will help extract the dry core, which will catch fire easily. 
Lesson 7: Relatively large logs can either be chopped, or, split by way of batoning. So, one needs to carry either a hatchet, a sturdy knife or a flexible wood saw. 
Lesson 8: Using a hatchet, knife or a flexible saw to process timber can be quite tiring. The best way is to start a fire and feed the log over the fire. That’s an effective way to conserve energy in a survival situation in the wilderness.
Lesson 9: Using a flint and striker to light a fire is easier said than done. One must carry matchboxes and a candle on any trip to the wilderness.
Lesson 10: The matchsticks can be made waterproof by dipping the heads in molten wax. For added precaution, carry cotton balls soaked in Vaseline. They are good for starting a fire.
The fire lit, we quickly got down to cooking a Maggi meal. The water, we fetched from a nearby stream. Up in the hills, under the warm Sun and by a cool brook, I lazed about for an hour or so, till it was time to go, when I learned about another lesson—smoke signals and their importance. 
Lesson 11: Placing green foliage over a fire gives out a thick white smoke. The greater the volume of the green foliage over the fire, the thicker and denser is the smoke. Such a smoke signal can be used to draw the attention of rescuers during a natural disaster. BUT, A WHITE SMOKE WILL ONLY BE HELPFUL IN A GREEN SURROUNDING. IN A SNOW-COVERED LANDSCAPE, A WHITE SMOKE WON’T WORK. ADDING A SMALL PIECE OF RUBBER, SUCH AS THAT FROM THE SOLE OF THE HIKING BOOTS WILL GIVE OUT A BLACK SMOKE, WHICH WILL BE VISIBLE IN A WHITE LANDSCAPE. 
The day’s trek done, we ambled back to our refuge. Having finished our sumptuous dinner, we decided to walk to the meadow. The moon cast an eerie glow through the clouds flitting in and out of the sky. The landscape was bathed in a pale white glow.
But the night lessons were also to be done, as I realised.
Lesson 12: The international distress signal or SOS by light or whistle includes three short bursts followed by three long bursts and then three short bursts again. With flashlights, one can send the SOS signal by switching on the light in the designated manner. Many modern flashlights, such as those by Maglite or Led Lenser come with inbuilt SOS systems. 
As the night wore on, the air became chilly. Though I was suitably encased in a jacket, the chill was a little too much for comfort. The survival blanket he carried in his backpack proved handy then.
Lesson 13: A survival blanket should always be carried on a trek and definitely on a day hike. Once wrapped around the body, it prevents the loss of body heat, thereby offering protection from the cold in a survival situation. It can also be used as a temporary shelter against rain and wind.
The next day was a relaxed hike where we had pasta by the banks of a dry riverbed and other lessons to be learned.
Lesson 14: Have a survival kit with you all the time on a trek. It should contain a mess tin (which can be used as a cooking utensil as well) and inside it, a candle, matchbox, mirror for signalling, needles and thread, fishing hook, a flexible wood saw, a small compass, a small pocket knife, tweezers, an emergency pocket torch, a length of paracord (This proved handy on the first day of the trek when I found it difficult to climb with my backpack. He went up and hauled my luggage up with the help of the paracord).
Lesson 15: Carry some potatoes, onions and chocolates with you. Potatoes and onions can be roasted over the fire for a quick snack. And chocolates! Well, who doesn’t love chocolates? 
The days spent in the heart of nature, breathing in the fresh air and soaking in on the beauty of the mountains were beautiful, but I had also picked up some essential survival lessons. More importantly, I was now aware of some of the basic things one needs to know when on a trek. And there is a lot more to learn!
—————————————————————–
Want to learn wilderness survival skills?
Get in touch with Sutirtha Sanyal at silverhein@gmail.com and the FB page: Tales For Trails